How to Draw a Flowchart in 5 Easy Steps
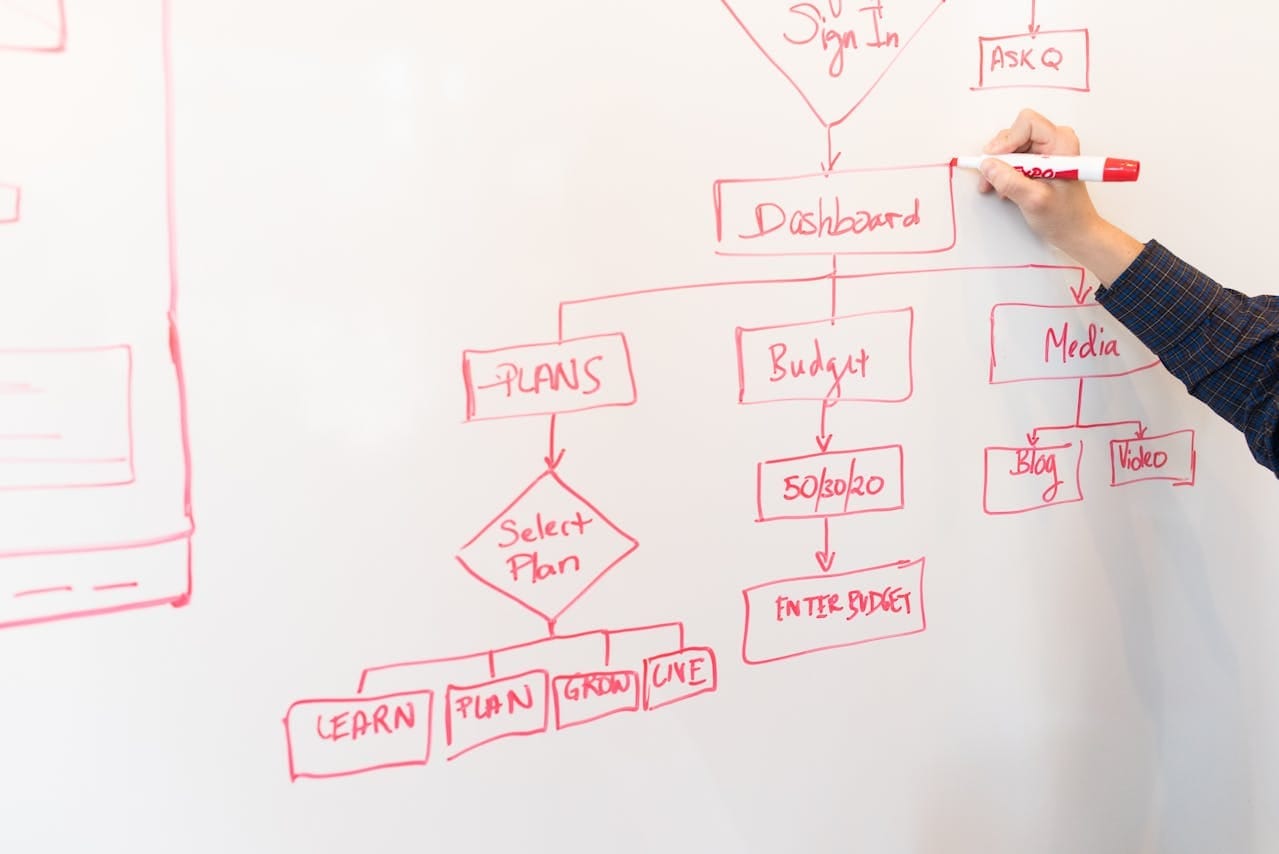
Drawing a flowchart might seem confusing at first—but it’s actually one of the best ways to bring clarity to complex business processes. A well-designed flowchart helps visualize the flow of tasks, highlights responsibilities, and reveals the importance of each activity within a process.
In this guide, you'll learn how to draw a flowchart using BPMN (Business Process Model and Notation)—the most modern and effective notation used worldwide for documenting business processes. BPMN is not only standardized and professional but also intuitive and ideal for both technical and non-technical audiences.
To make things even easier, we’ll use HEFLO, a free online tool that supports BPMN flowchart creation. You can create a free account in just a few clicks and follow along with the exercise as we build the flowchart together.
👇 Click the button below to get started with your free HEFLO account.
Let’s walk through 5 simple steps to design your first professional flowchart. Ready to begin?
How to draw a flowchart in 5 steps
Step 1: Define Responsibilities
If you're learning how to draw a flowchart to better understand a business process, the first and most important step is to identify the roles involved.
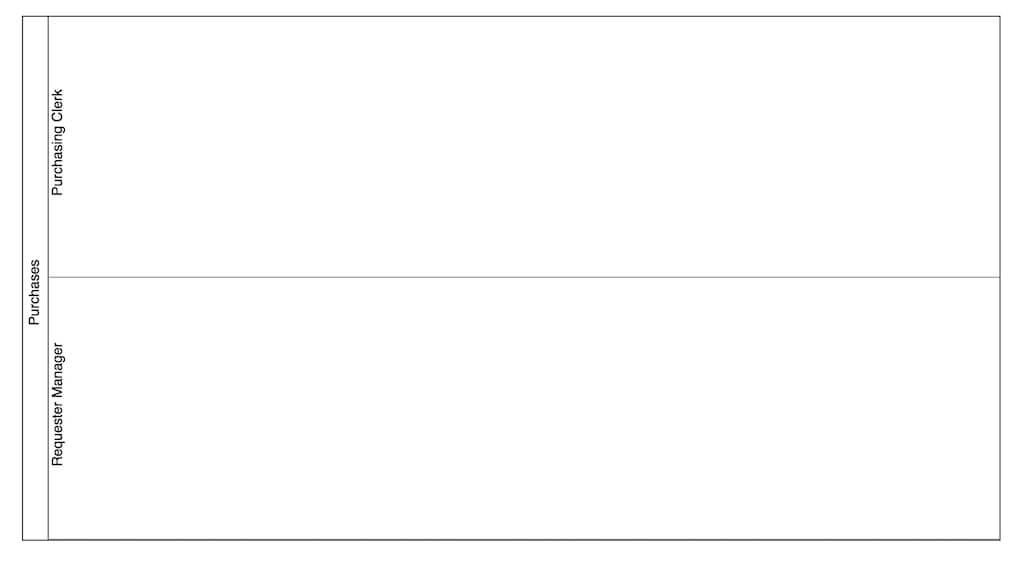
In BPMN flowcharts, this is done using pools and lanes, which help you structure responsibilities clearly:
- Pools represent an entire process and may contain one or more lanes. Typically, a process includes a single pool, but multiple pools can be used to show how different processes interact.
- Lanes divide a pool into sections, each representing a role, team, or system involved in the process.
👍 Good examples include: HR Manager, Personnel Department, Service Desk.
🚫 Avoid using personal names in lanes. Instead, define roles like Ticket Scheduler or Manager to keep the diagram scalable and professional.
Not using HEFLO yet? Create your free account below and follow along with the video to model your own process step by step.
Below is a visual example of how to structure lanes in a BPMN diagram:
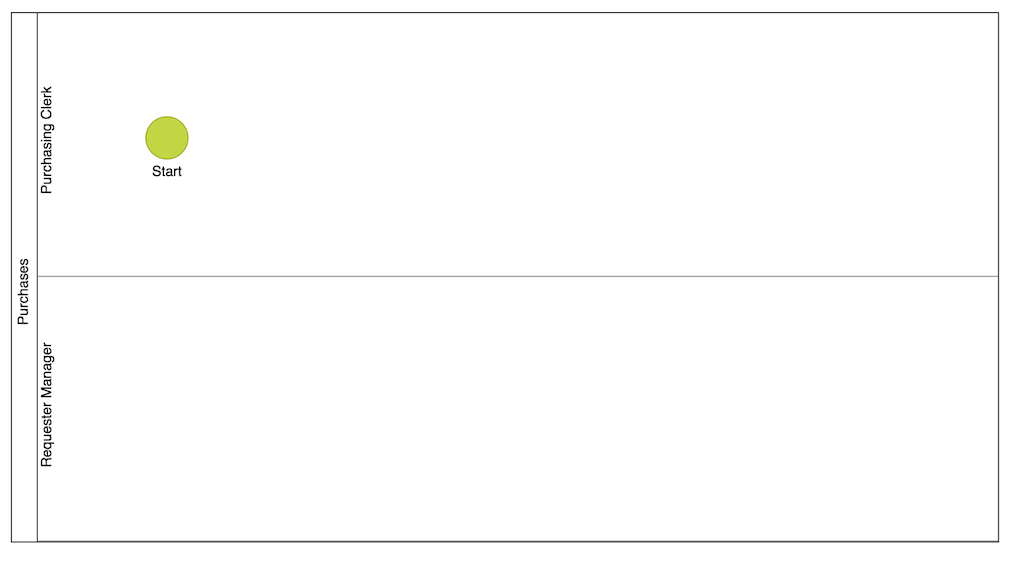
Step 2: Add an Initiator
The next step in learning how to draw a flowchart is to define how the process begins—this is known as the initiator event.
In a BPMN diagram, the initiator marks the starting point of a process. It tells you what triggers the workflow, which could include:
- A person manually starting the process
- Receiving an email or message
- A system integration
- A scheduled timer
- Or other types of events
These start events are represented by a thin-bordered circle, and in HEFLO, they appear with a green background to make them easily recognizable.
For this exercise, include a manual initiator, which is shown as a start event without an icon inside and labeled simply as “Start”.
Here’s an example of a process flow with the initiator:
✅ Best practice tip:
You can include multiple initiators in a BPMN diagram. However, it's best to use only one manual initiator to keep the flow clear and consistent.
Step 3: Add Tasks and Deviations
Now that you’ve added an initiator, the next step in how to draw a flowchart is to insert tasks and deviations—the core elements that define the logic and flow of your process.
🧩 Tasks
Tasks represent the actions performed during the process. These can be either:
- Human tasks – performed by people (ideal for simple flowchart modeling)
- System tasks – performed automatically by systems or applications
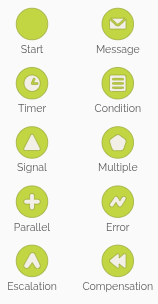
BPMN supports multiple task types—such as manual, user, service, and script tasks—making it possible to model both simple and complex workflows. Each task type is identified by a small icon in the upper-left corner of the task element.
For this example, you can simply use a generic task, without worrying about mastering all the variations.
Below, you’ll find an image showing the different BPMN task types for reference.
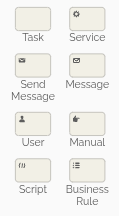
For this exercise, focus on human tasks to keep things simple. Example:
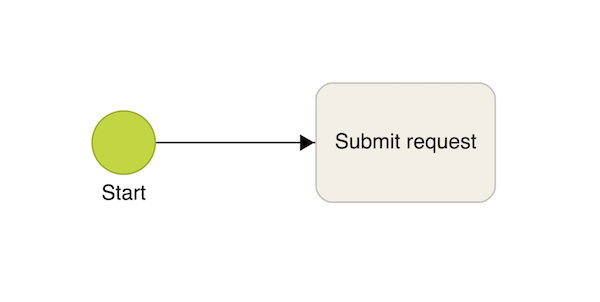
In the image above, you can see a start event connected to a task—this connection is called a sequence flow. It’s represented by an arrow that shows the direction in which the process progresses from one element to the next.
🔀 Gateways (Deviations)
To define decision points in your flow, you’ll use gateways—elements that determine which path the process should follow based on specific conditions or outcomes.
Just like tasks and events, there are several types of gateways, and each type is identified by an icon in the center of the gateway symbol. You can see an image below showing the different types of BPMN gateways for reference.
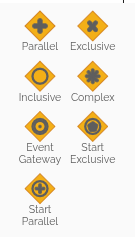
The most common is the Exclusive Gateway, which allows the flow to follow only one of several possible paths, depending on the decision made at that point.
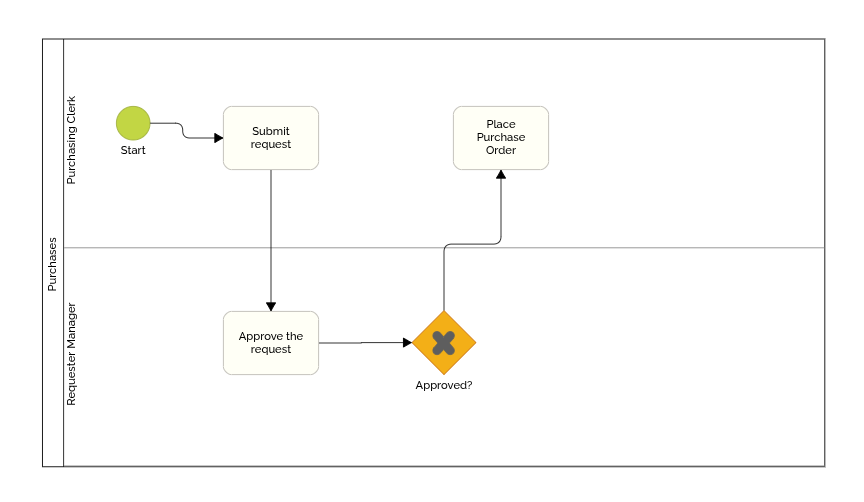
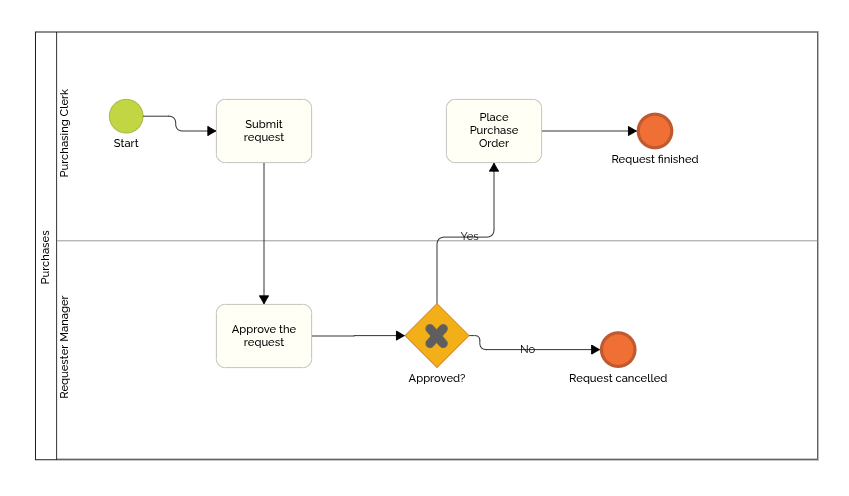
In the example below, after the task “Approve the Request”, the process either moves on to “Place Purchase Order” or proceeds to the end event, which we'll explore shortly.
✅ Best practice tip:
Arrange tasks and gateways from left to right—this creates a timeline-like structure that improves readability.
Here’s how it should look:

Step 4- Mark the end of the process
Now it’s time to show how the process ends in your flowchart. Just like start events and tasks, BPMN provides several types of end events to represent different ways a process can conclude.
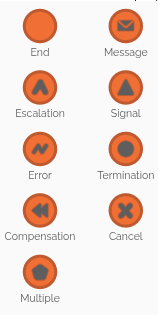
Each end event can contain an icon that represents the “trigger”—that is, the action that occurs when the process reaches that point. For example, it might trigger a message, an error, or another event.
Also, pay attention to the label of the end event: it should describe the final state of the process instance (e.g., “Request Approved,” “Order Canceled”). This helps clarify the outcome of that specific process path.
For this exercise, add two end events and label them “Request Finished” and “Request Cancelled,” as shown in the image below.
Step 5: Review Your Flowchart Design
At this stage, your flowchart is complete—and what you’ve created is called an “as-is” process map, which represents the current state of your process as it operates today.
Now is the time to review the entire flow: revisit the start and end events, decision points, tasks, and handoffs. Mentally walk through the process and check if it accurately reflects reality. Is something missing? Are there unnecessary steps? Is it clear who is responsible for what?
Once you're confident your flowchart represents the existing situation, the next step is to begin thinking about a “to-be” process or business process redesign—a future, improved version of the workflow. This is when you identify bottlenecks, inefficiencies, or opportunities to apply automation and technology to make your process more efficient.
🚀 Ready to take your process to the next level?
Check out our article on Business Process Redesign, featuring real-world examples of transformation initiatives from major organizations around the globe.
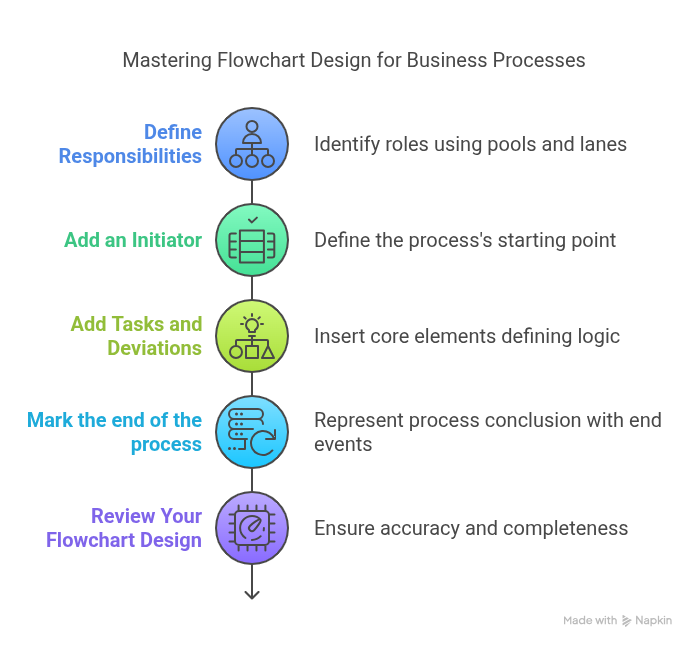
📌 To wrap up your learning journey, we’ve prepared a visual summary of the full tutorial. This infographic brings together the 5 essential steps for drawing a BPMN flowchart—from defining responsibilities to reviewing the final process.
See a Ready-Made Example: Vacation Leave Request Process
One of the best ways to accelerate your understanding of how to draw a flowchart is by exploring real examples. Seeing a complete and well-structured process helps you connect the concepts you've learned so far and apply them in practice.
Below, you’ll find a ready-made Vacation Leave Request process modeled using BPMN. It’s a simple yet practical example that demonstrates how to define responsibilities, use start and end events, add tasks, and include decision points.
Take a moment to review the diagram and observe how each element plays a role in guiding the process from start to finish.

Also, Click the button below to open and edit this diagram with your free HEFLO Modeler account.
👉 Want to explore more examples?
Check out our dedicated article with a variety of ready-to-use BPMN flowcharts to inspire and accelerate your learning. Click the button below to see more process flowchart examples.
🎓 Free Video Class: Business Process Modeling with BPMN
Want to go further in your learning journey?
We’ve prepared a free video class that dives deeper into business process modeling with BPMN. In this lesson, you’ll get a more detailed explanation of the elements covered in this tutorial—such as pools, lanes, tasks, events, and gateways—along with practical tips on how to apply them effectively.
Whether you’re just starting out or want to strengthen your skills, this class is a great next step to improve your process modeling.
🎥 Watch the class below and continue building your confidence with BPMN.